Every experienced woodworker started somewhere. For most, it was a lopsided birdhouse, a wobbly shelf, or a cutting board with a few gaps in the glue joints. The difference between people who stick with the craft and people who quit after one frustrating weekend usually comes down to one thing: starting with the right woodworking plans for beginners.
Woodworking is one of the most rewarding hobbies you can pick up. You end up with useful things for your home, a skill you can build on for decades, and, for many people, a source of extra income. But the beginning can feel overwhelming. Which tools do you need? Which wood should you buy? Which project won't fall apart, or leave you standing in the garage wondering what went wrong?
This guide answers those questions. Below you'll find:
The essential beginner woodworking tools (and what you can skip for now)
How to choose the right wood for your first projects
10 easy woodworking projects for beginners, ordered from simplest to more ambitious, with materials, tools, time estimates and tips for each
Common beginner mistakes and how to avoid them
How to choose good DIY woodworking plans so you never get stuck halfway through
Let's get started.
Why Beginners Need Good Woodworking Plans
It's tempting to grab some lumber and "figure it out as you go." Some people enjoy working that way, but for a true beginner it's usually an expensive way to learn. A quality set of woodworking plans does several things for you:
1. It saves money. A good plan includes a cut list and materials list, so you buy exactly the lumber and hardware you need. Beginners who freestyle often buy too much, too little, or the wrong thing entirely.
2. It removes guesswork. Measurements, angles, joint types and assembly order are already worked out. You can concentrate on learning technique instead of doing geometry at the workbench.
3. It builds skills in a logical order. The best beginner woodworking plans introduce one or two new skills per project, such as accurate measuring, square cuts, drilling pilot holes, gluing, sanding and finishing.
4. It improves your success rate. Nothing motivates a new woodworker like finishing a project that looks good and works. Early wins keep you going.
5. It teaches you to read plans. As you progress, you'll adapt plans, resize them and eventually design your own. That starts with understanding how a well-drawn plan is put together.
When you're evaluating any set of plans, look for these features:
A complete materials list with dimensions
A cut list showing every piece and its size
Step-by-step instructions in a sensible order
Diagrams or photos that match the written steps
A stated skill level and estimated build time
Plans missing these details are the ones that leave beginners stranded.
Essential Beginner Woodworking Tools (You Don't Need a Full Workshop)
One of the biggest myths about woodworking for beginners is that you need thousands of dollars of machinery. You don't. Most of the projects in this guide can be built with a small, affordable tool kit.
The Starter Kit
Tape measure (and a combination square): Accurate measuring and marking is the foundation of everything. A combination square lets you mark true 90° and 45° lines.
Pencil and marking knife: A sharp pencil is fine to start. Thin, precise lines lead to tighter joints.
Hand saw or circular saw: A basic handsaw works for small projects. A circular saw makes breaking down boards and plywood much faster.
Jigsaw: Useful for curves, cutouts and rounded corners.
Cordless drill/driver: The most versatile tool in a beginner's kit. You'll use it for drilling holes and driving screws.
Drill bit set and countersink bit: For pilot holes, so wood doesn't split, and for screw heads that sit flush.
Clamps: You can never own too many. Start with at least four bar or F-style clamps for glue-ups and holding work steady.
Sandpaper (80, 120 and 220 grit) and a sanding block: Sanding is what separates a rough-looking project from a professional-looking one. A random orbital sander is a great early upgrade.
Wood glue: A quality PVA wood glue makes joints stronger than the surrounding wood when applied correctly.
Hammer and nail set: For brad nails, finishing nails and small assembly jobs.
Nice-to-Have Upgrades Later
Pocket-hole jig (a huge time-saver for beginner furniture)
Random orbital sander
Miter saw
Router
Block plane
Safety Gear Is Not Optional
Safety glasses every time you cut, drill or sand
Hearing protection around power tools
Dust mask or respirator when sanding or cutting
Push sticks and clamps to keep hands away from blades
Sturdy closed-toe shoes and no loose sleeves or dangling jewelry
Good habits formed early stay with you for life, so make safety part of your routine from the first cut.
How to Choose Wood for Your First Woodworking Projects
The lumber aisle can be confusing. Here's a beginner-friendly breakdown.
Pine. Affordable, widely available and easy to cut and sand. It's soft, so it dents easily, but that makes it forgiving to work with. Pine is ideal for practice projects, shelves, crates and paint-grade pieces.
Poplar. A hardwood that behaves like a softwood. It's inexpensive, cuts cleanly and takes paint beautifully. Great for painted furniture and boxes.
Cedar. Naturally rot-resistant and pleasantly aromatic. It's a top choice for outdoor projects like planters, birdhouses and garden benches.
Oak, maple and walnut. Classic hardwoods that are durable and beautiful, but pricier and harder to work. Maple and walnut are popular for cutting boards, and oak for sturdier furniture. Save these for after you've built a few projects in cheaper wood.
Plywood. Stable, flat and great for shelves, cabinets and shop projects. Look for cabinet-grade or birch plywood for a cleaner finish.
A few quick buying tips:
Sight down each board like a rifle barrel to check for warping, twisting or bowing
Avoid boards with large knots or cracks in the areas you need to cut
Buy 10 to 15 percent extra to allow for mistakes and offcuts
Let lumber acclimate in your workspace for a few days before building
Never use pressure-treated lumber for food-contact projects or edible garden planters
The 10 Best Beginner Woodworking Projects (Easy Step-by-Step Ideas)
The projects below are arranged roughly from simplest to more advanced. Each one teaches a specific set of core woodworking skills, so by the tenth you'll have a solid foundation.
1. Simple Wooden Birdhouse
Skill level: Very easy | Time: 2–3 hours | Cost: Low
Recommended wood: Cedar or pine
Tools needed: Handsaw or circular saw, drill, hammer or nails/screws, sandpaper
A birdhouse is the classic first woodworking project, and for good reason. It involves straight cuts, basic assembly and a small footprint, so you can finish it in a single afternoon. It's also inexpensive, and if you make a mistake, you've barely wasted any material.
What you'll learn:
Measuring and marking accurately
Making square cuts
Drilling an entry hole with a spade or hole-saw bit
Assembling with nails or screws
Basic sanding
Pro tips: Use untreated wood and leave the interior unfinished, because birds don't like chemical smells. Drill small drainage holes in the floor and add ventilation gaps near the top. Choose an entry-hole size suited to the bird species in your area.
This is the perfect confidence-builder. Once you've built one, you'll want to try more.
2. Wooden Picture Frame
Skill level: Very easy to easy | Time: 1–2 hours | Cost: Very low
Recommended wood: Poplar, pine or oak
Tools needed: Miter box and saw (or miter saw), wood glue, clamps or a band clamp, sandpaper
A picture frame teaches one of the most valuable skills in woodworking: cutting and joining miters. Four accurate 45° cuts, some glue and a clamp are all it takes.
What you'll learn:
Cutting precise 45° angles
Gluing mitered corners
Clamping for square assembly
Adding a rabbet or backing for glass and photo
Pro tips: Cut opposite sides at identical lengths, because if two pieces differ even slightly, your frame won't close square. Dry-fit before gluing. Frames make excellent gifts, so plan to make several once you get the hang of it.
3. Wooden Cutting Board
Skill level: Easy | Time: 2–4 hours (plus glue drying time) | Cost: Low to medium
Recommended wood: Maple, walnut or cherry (hard, tight-grained, food-safe woods)
Tools needed: Saw, clamps, wood glue, sander, food-safe finish
A cutting board is one of the most useful beginner woodworking projects you can make. It teaches glue-ups, flattening and finishing, and it's a gift people genuinely use. A simple edge-grain board made from three or four strips is a great starting point.
What you'll learn:
Edge-gluing boards into a wider panel
Clamping evenly without slipping
Sanding progressively through grits
Applying food-safe mineral oil or board conditioner
Pro tips: Use a waterproof wood glue rated for food-contact surfaces once cured. Wipe away squeeze-out before it hardens. Round over the edges slightly so the board feels great in the hand. Finish with several coats of mineral oil, and refresh it occasionally.
4. Floating Wall Shelves
Skill level: Easy | Time: 2–3 hours | Cost: Low
Recommended wood: Pine, poplar or plywood with edge banding
Tools needed: Drill, saw, level, stud finder, sandpaper, paint or stain
Floating shelves look modern and clean, and the simple box construction makes them a beginner-friendly build. They're also immediately useful in any room.
What you'll learn:
Building a simple hollow box frame
Using a level and stud finder correctly
Mounting to a wall securely
Applying stain or paint for a finished look
Pro tips: Always anchor into wall studs or use heavy-duty wall anchors rated for the load. Sand all surfaces before assembly, because it's much easier than sanding inside corners afterward. Test-fit your bracket or cleat before mounting.
5. Cedar Planter Box
Skill level: Easy | Time: 2–4 hours | Cost: Low to medium
Recommended wood: Cedar (naturally rot-resistant)
Tools needed: Saw, drill/driver, exterior screws, sandpaper
A planter box is another excellent first project, with straight cuts, a rectangular shape and forgiving tolerances. It's also perfect for herbs, flowers or vegetables.
What you'll learn:
Building a square box with butt joints and screws
Using pilot holes and countersinking to prevent splitting
Adding drainage holes and spacing boards
Choosing outdoor-appropriate fasteners
Pro tips: Use stainless steel or exterior-coated screws to prevent rust and staining. Leave small gaps between bottom boards for drainage. If you're growing edible plants, stick with untreated cedar and skip chemical finishes.
6. Wooden Storage Crate
Skill level: Easy | Time: 2–3 hours | Cost: Low
Recommended wood: Pine or poplar
Tools needed: Saw, drill, screws or nails, sander
A rustic wooden crate is functional, stylish and ideal for practicing repeatable cuts. Build several and stack them as shelving, use them for storage, or fill them with firewood or magazines.
What you'll learn:
Cutting multiple identical pieces from a cut list
Consistent spacing between slats
Squaring a box during assembly
Adding handles by drilling or cutting a grip opening
Pro tips: Use a spacer block to keep slat gaps even. A stop block on your saw setup ensures each piece is exactly the same length, a habit that pays off in every project you'll ever build.
7. Three-Step Wooden Step Stool
Skill level: Easy to intermediate | Time: 3–5 hours | Cost: Low to medium
Recommended wood: Pine, poplar or oak
Tools needed: Saw, drill, pocket-hole jig (optional), clamps, sander
A step stool moves beyond simple boxes and introduces load-bearing construction. It has to hold weight, stay stable and stay square, so it teaches you why joinery matters.
What you'll learn:
Cutting angled parts
Using pocket-hole joinery or dowels
Building strong, square frames
Checking stability and wobble
Pro tips: Use glue and screws together for maximum strength. Check for square with a diagonal measurement before the glue sets. Round over the step edges for comfort and safety.
8. Simple Bookshelf
Skill level: Intermediate beginner | Time: 4–6 hours | Cost: Medium
Recommended wood: Pine, poplar or birch plywood
Tools needed: Circular saw or table saw, drill, pocket-hole jig, clamps, sander
A basic bookshelf is where your skills start to compound. You'll be working with longer boards, multiple shelves, and the need for a level, square, stable finished piece.
What you'll learn:
Breaking down long boards accurately
Cutting dadoes or using shelf pins for adjustable shelves
Assembling large frames square
Attaching a back panel for rigidity
Anchoring furniture to the wall for safety
Pro tips: Take extra care measuring the shelf spacing, because a mistake repeats on every shelf. Anchor tall bookcases to the wall, especially in homes with children. Finish with a coat of primer and paint or a wipe-on stain and clear coat.
9. Modern Coffee Table or Side Table
Skill level: Intermediate | Time: 5–8 hours | Cost: Medium
Recommended wood: Pine, poplar, oak or plywood with a hardwood top
Tools needed: Saw, drill, pocket-hole jig, clamps, sander, finish
Furniture is where woodworking becomes truly satisfying. A simple table teaches you about aprons, legs, tabletops and how to make a piece that sits flat on the floor.
What you'll learn:
Building legs and apron frames
Creating a solid glued-up tabletop
Attaching a top so it can expand and contract with humidity
Applying a durable finish for everyday use
Pro tips: Use tabletop fasteners or figure-eight clips instead of screwing the top down tightly, which lets the wood move naturally with seasonal changes. Take extra time sanding the top, because it's what everyone sees and touches.
10. Outdoor Garden Bench
Skill level: Intermediate | Time: 6–10 hours | Cost: Medium
Recommended wood: Cedar, or other weather-resistant lumber
Tools needed: Circular saw or miter saw, drill, clamps, exterior screws, sander, exterior finish
An outdoor bench is a great capstone for your first ten projects. It combines nearly everything you've practiced: accurate cutting, strong joinery, sturdy assembly, sanding and finishing, all in a piece you'll enjoy for years.
What you'll learn:
Building a load-bearing frame
Cutting angles for a comfortable seat and back
Choosing the right fasteners and finish for outdoor use
Planning for water drainage and wood movement
Pro tips: Use exterior-rated glue and corrosion-resistant screws. Keep end grain from sitting in standing water, and apply a quality outdoor sealer or oil. Test comfort by sitting on it before final assembly, because a slightly different seat angle can change everything.
Where to Find High-Quality Woodworking Plans for Beginners
Once you've decided which projects to tackle, you'll need reliable instructions. There are three main sources:
Free plans online. Blogs and video channels offer plenty of free plans, and they can be excellent. The downside is inconsistency. Quality varies widely, measurements can be incomplete, and it can take hours to find a plan that suits your skill level and tool set.
Magazines and books. Woodworking magazines and project books offer well-tested designs, but you're limited to the projects in each issue or volume.
Large plan collections. An all-in-one library of plans lets you browse by project type, skill level and style in a single place, which suits beginners who want to keep building without hunting for new instructions every time.
Where Ted's Woodworking Fits In
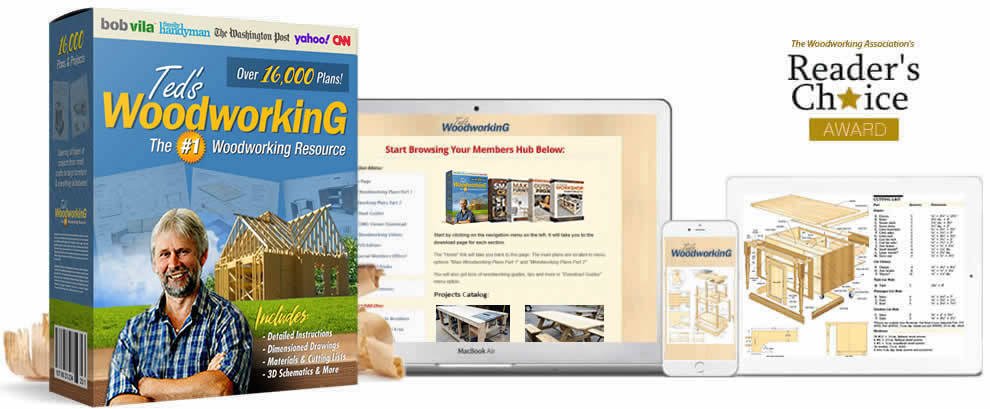
If you like the idea of one big library, Ted's Woodworking is one option to consider. It's presented as the work of Ted McGrath, who says he spent over 25 years studying the problems woodworkers face when searching for plans, and the collection includes more than 16,000 projects. The catalog is described as running from simple items like birdhouses to complex furniture, which lines up with the beginner-to-intermediate ladder in this guide.
shorthandstories
On format, the plans are available as both DWG and PDF files, so you can print them for the workshop or view them on a tablet or laptop. The projects in this article, such as birdhouses, planters, shelves, benches and tables, are the kind of everyday builds you'd expect to find in a collection this broad.
ipsnews
As with any plan library, judge it by the individual plan you're about to build. Before you commit to a project, check that it has a cut list, a materials list, clear diagrams and a skill-level rating that suits you. A big library is only useful if the plans you choose are ones you can follow.
8 Common Beginner Woodworking Mistakes (and How to Avoid Them)
Everyone makes mistakes early on. Knowing the common ones in advance can save you time, money and lumber.
1. Skipping the plan. Building without measurements or a cut list leads to wasted wood and awkward proportions. Start with a plan.
2. Not measuring twice. "Measure twice, cut once" is a cliché because it's true. A cut that's 1/8" short can't be fixed.
3. Rushing the glue-up. Wood glue has an open time. Have your clamps set, your pieces dry-fitted and a damp rag ready before you apply any glue.
4. Skipping pilot holes. Screwing directly into hardwood, or near the end of a board, is a fast way to split it. Always pre-drill.
5. Sanding too little, or jumping grits. Work through 80, 120 and 220 grit in order. Skipping grits leaves scratches that show up under stain.
6. Ignoring the direction of the grain. Cutting, planing and sanding with the grain gives cleaner results. It also affects strength.
7. Using the wrong fasteners. Interior drywall screws in an outdoor project will rust and fail. Match your hardware to the environment.
8. Buying expensive wood too soon. Practice with affordable pine and poplar first. Save the walnut and cherry for when your skills catch up.
How to Progress After Your First 10 Woodworking Projects
By the time you've completed these ten builds, you'll have real, transferable skills: measuring, cutting, joinery, clamping, sanding and finishing. Here's how to keep growing:
Learn a new joint. Try dados, rabbets, half-laps, or mortise and tenon.
Upgrade your tools gradually. A quality miter saw, router or random orbital sander can transform your workflow.
Tackle larger furniture. Desks, dining tables, dressers and cabinets are natural next steps.
Study finishing. Learn about stains, oils, shellac and polyurethane, and how each behaves on different woods.
Set up your shop. Organize your space for safety and workflow, and add dust collection when you can.
Consider selling your work. Cutting boards, planters, shelves and benches are popular items at local markets and online.
Frequently Asked Questions About Woodworking Plans for Beginners
What is the easiest woodworking project for a beginner?
A simple birdhouse, picture frame or basic crate is usually the easiest. They involve straight cuts, minimal joinery and a small amount of inexpensive material.
What tools do I need to start woodworking?
A tape measure, combination square, saw, cordless drill, clamps, sandpaper, wood glue and safety gear will get you through most beginner projects. Add a pocket-hole jig and sander as your budget allows.
What is the best wood for beginners?
Pine and poplar are the most beginner-friendly: affordable, easy to work and forgiving. Use cedar for outdoor projects.
Are woodworking plans worth paying for?
It depends on how you learn. Free plans can be great, but quality is inconsistent. Paid plans and collections tend to offer more standardized formatting, such as cut lists, diagrams and materials lists, and let you find projects in one place. Whichever route you choose, evaluate the plan itself before you buy lumber.
Can I learn woodworking with no experience?
Absolutely. Start with small, low-cost projects, follow clear plans, prioritize safety and build up gradually. Most skilled woodworkers began exactly this way.
How much does it cost to start woodworking?
A basic starter kit can be assembled for a modest budget, and you can add tools over time. Buying used tools, borrowing from friends or using a community workshop can lower the cost even further.
How do I read woodworking plans?
Start with the materials list and cut list, then look at the assembly diagrams. Follow the steps in order, and mark each part as you cut it so you don't lose track.
Can I make money from woodworking as a beginner?
Many people do. Small, well-finished items like cutting boards, planters and shelves sell well. Start by giving them as gifts, then move to local markets or online shops once your quality is consistent.
Final Thoughts: Start Small, Build Confidence, Keep Going
The best woodworking plans for beginners aren't the flashiest or the most complex. They're the ones that teach you something new, fit your tools and budget, and leave you with a finished piece you're proud of.
Start with the birdhouse or picture frame. Move on to the cutting board and shelves. Tackle the step stool, bookshelf and table as your confidence grows, and finish with the garden bench. By then, you won't just have ten completed projects. You'll have the skills, habits and curiosity to build almost anything.
Pick your first project, gather your materials, put on your safety glasses and make that first cut.
Ready to start building? Explore the full collection of step-by-step woodworking plans and pick your first project today.

AI Website Generator